Tuesday, November 26, 2013

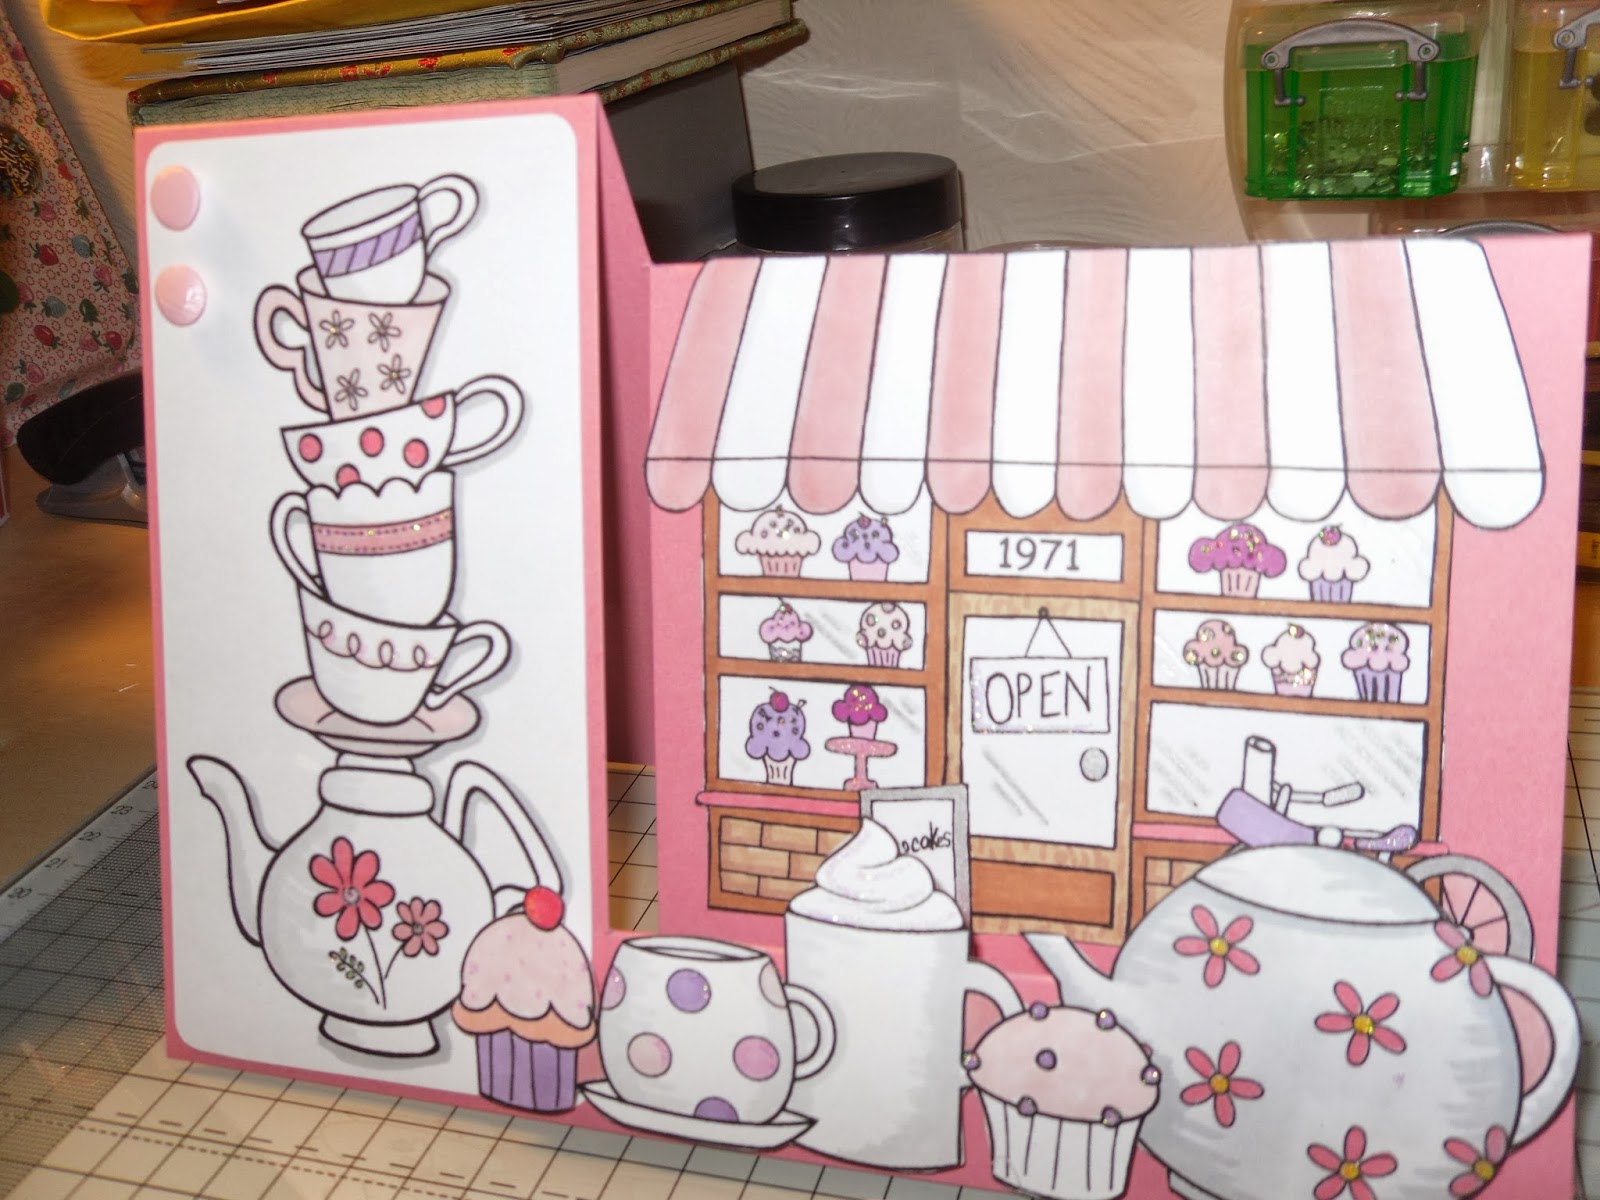
Coffee Shop Stepper Card

I decided to have a play with some digistamps I've had sitting in my stamp folder for a while now. I'll be entering this into the brand new Crafting from the Heart Challenge Blog which has an "Anything Goes" theme this week, as well as the "Anything Goes" theme at Artistic Inspirations Challenges and the "No People" theme at Left of Center Challenges.

I'm also going to have a play with side steppers, which I've tried with varying degrees of success in the past.

First of all though, to my trusty Inkscape...what would I do without this program, honestly!


The stamps I'm using are from a variety of sources. The bakery comes from The Stamping Boutique, the stack of teacups comes from Pink Cat Studio and the individual cups and cakes come from Digi Stamp Boutique.

These are the stamps scaled and positioned roughly where they'll be on the final card:


I printed them on Super Smooth card, used my Cricut to cut the most complicated section (the grouped digi at the front) coloured the images with ProMarkers, then glittered various parts with my quickie glue pen, and they were ready for the card.


To make the card I measured a 3cm step and an 8cm side panel from 300gsm rose pink card.


Then it was just a case of piecing it all together and tada!


I hope you like it.

MC x

Tuesday, November 19, 2013

I'm back!

After a huge gap in my blogging and crafting life, I'm back with a vengeance! Just by way of explanation: last year my work became very busy and blogging took a bit of a back seat. I started to get more wedding orders, and that just became a priority, along with my full time job and craft orders. But something has happened which has made my life change pace once again. 8 weeks ago, this little creature made his way into our lives!


This is Chael (Ch-ayl) Andrew, and he's an absolutely fantastic wee boy. He's made me reconsider everything in my life, especially my work life, and I've decided to really get into my crafting again. So, the blog has returned!

Because we live in a 2 bedroomed house, our lovely big "hobby" room which had our library, music equipment, party space and a big craft area in it has been turned into a nursery. This was a labour of crafting love in itself:


But we had a little walk-in cupboard built in it to use as storage as he wouldn't need that whole huge room. As soon as I saw how spacious the little cupboard was it was adopted. It's now the Craft Nook! I love it so much but it's very compact. I'm just happy to have a dedicated craft space. Sorry about the picture quality here, this was taken on my phone:


I'll put up a separate post about the nursery and one about my new craft space soon.

Anyway, now that I am up and running with my crafting I'll be back very soon with more blog posts. I'm also going to start applying for design teams, so watch out crafty world!

MC x

Saturday, April 7, 2012

Stash Card

I haven't done a craft blog post in months and months...so I decided to use my Easter break wisely and get crafting! Coupled with the fact I've just gutted my craft workspace to make it pretty and beautiful and clean, I was itching to craft.


Of course, by cleaning out my space I realised just how much STASH I have hidden away in those storage drawers! Look at the paper stash alone! That's a big A4 box file! I also found loads of little freebies from magazines, and some ribbon and stuff that I bought in sales on honeymoon (yes, I went craft shopping on honeymoon) and things.


So, I decided to make a card using only stashed items, and I think I stuck pretty well to it!

I also decided to use the sketch over at Annabelle Stamps Blog (find the sketch here) and it was the very first time I've made a card using one! I'll be entering this wee baby into that challenge.

Basics:

The pink card was free in a magazine kit. I don't usually use prescored cards but I decided that it was there in my stash, and I would have to use it at some point, so why not?


I dug around on the internet for a freebie digistamp which would work well in a circle shape - I have a terrible habit of just buying a brand new digi for every card I make. I wanted to satisfy my digibuying addiction but not pay any money, so I found this absolutely fabulous Wine Fairy over at Broken Box Stock's freebie page! How fantastic is that? And so true!

I popped her into Inkscape and scaled her down to fit inside my 6cm circle X-cut die for my Cuttlebug - I've only ever used the two largest circles of this kit so it was lovely to use the smaller size.

I even managed to print her out on a piece of card from my stash! My printer moaned about this initially as I told it the page was A4. I lied. I'm sorry, printer.

For the last three months I've had Prismacolour watercolour pencils in my equipment stash and I've used them once. I dug them out because the stamp was too delicate for my trusty Promarkers and I couldn't be bothered using my extra fine nibs. Lazy, lazy crafter. Then my Sakura glitter pen came out to play on the wings and wine.


She went through my trusty (as you can see, well used) Cuttlebug ready for taking her place on the card.

I have tons of ribbon - mostly plain - which I use on lots of cards, but I can't resist a bargain. I deliberated over two cheap Docrafts 99p ribbon spools that I haven't had a chance to use yet (I have so many £1 or £2 craft items which I pick up because they'll be "so handy" and then never actually touch)...


Then I struck gold! I found a ribbon I bought in Michael's on honeymoon for 99c! It had the lovely purpley pink colour as well as the white and that teal is my favourite colour in the world...it had to go on the card.

Digging through my stash of paper and card I found a lovely deep purple colour for the mat. It matched the ribbon and pulled things together a little bit.

And then another crafty dilemma...gems or pearls? Gems or pearls?


I remembered my own little promise to myself to use only items from my stash, and dug out three pink gems which had come free with a magazine. I usually just use plain diamonds or pearls, but this was my challenge!

Everything was stuck on, and I had a small disaster. The double sided tape I so confidently plastered across my card for the ribbon was too broad for it. Meep. I resorted to trusty glitter to cover the error...so now I have two very intentional narrow bands of glitter round the ribbon, of course. An expert touch!

I made up a funny wee sentiment and used tracing paper to transfer a nice font from the printer onto the card, writing it on with fineliner and rubbing out the transferred guideline.


Her prayers were answered and lo, the wine fairy cometh...


Hope you like it!

MC xx

Thursday, February 17, 2011

Spa

Mum and I are off to a spa for an overnight stay!  No craft for me til Saturday!


Monday, February 14, 2011

Alice in Wonderland Card

Right! It's been a wee while, but I decided to make an Alice in Wonderland themed card and take some pictures of the whole making process to let my friends see it! I only started taking the photos after I had coloured the image, but here goes nonetheless:

Alice and the Hatter coloured, adding the stitching:


A lovely wee shot of some of my markers!


Alice!


Teacups!


Alice and the Hatter stuck down:


The teacups layered on:


Sticky pads to layer it up!


Ribbon:


The part where there is huge potential to muck it up: writing on the card! Aaargh! Steady hand, steady hand.


Working out where the middle should go...


And promptly getting it a little off centre (oops):


Inserting the insert!


Advertising all the way!


Final touches (an envelope, a nice cellophane and a business card):


And drum roll please...the finished card!


There are a few wee things I love about this card: I'm never too brave about writing directly onto the card in case I make a spelling error or a silly mistake, but when I do it always ends up looking lovely, so I should bite the bullet more often. Also, I changed two things about my colouring. First off, I used a lot more pen on each image and it paid off in terms of shading. I would try this technique again. However, I also changed paper supplier and used cartridge paper for my printing, and I'm disappointed that it ran so much. If I'm going to use this colouring technique, I might need to invest in some proper Letraset paper for the Promarkers.

I have entered this wee card into three challenges:

The I <3 Promarkers Challenge Blog (Birthday)
The TotallyPaperCrafts Clean & Simple Challenge
And finally,
Charisma Cardz Mythical & Fantasy Challenge!

Wednesday, December 29, 2010

New Year's Resolutions

Well, it's been a wee while since I posted...ok, a big while, and I apologise. So much for all my good intentions! Anyway, getting our new house all ready and liveable took quite a while, and I'm only really just settling back into making cards for people again.

So! I'm making it my new year resolution to keep this thing a little bit more up to date, and to take part in more challenges when I can. I've also started getting orders for my cards in work, so if I make any cards to order I'll post a couple of pictures here too.

For Christmas I was a lucky girl...I got my mum's old Cricut because she upgraded hers to an expression, and I also got a sewing machine! So you can probably expect some lovely cut files, paper piecing, and stitching on my cards from now on!

MC x

Friday, July 16, 2010

Mr and Mrs...

Well, we did it! The wedding was incredible - definitely the best day of my life. I grinned from start to finish and savoured every moment of it. Here's a wee picture (we haven't got our professional ones yet, but lots of people took their cameras and passed photos on to us).


That's my mum and dad in the second photo, by the way! The honeymoon was brilliant too. I dragged David away from Disney and Universal for a wee visit to Michael's, where I bought a couple of Ranger goodies for mum which were discounted, and raided the dollar bins for myself. Got some ribbons and stamps, and they had awesome little pots of flocking in every colour under the sun - four for a dollar! Bargain! Never used it before though, so I put it to use on the card I made today for some challenges. Here you go!


The digi is from the lovely collection at Pink Cat Studio, which I discovered thanks to one of the challenges being sponsored by the site. Isn't it brilliant? It reminds me of American Beauty (which I watched on the way to America on the plane). Plus, it's just so cute!

That last picture has a couple of the flocked little hearts - they look really cute. I used the pink on the sentiment too and I'm not so sure about the result. I think it looks better when the colour underneath matches the colour of the flocking. Lesson learned for next time then!


Well, here's the rundown:

Digi: Pink Cat Studio (Lily & Billy laying in hearts)
Coloured with Promarkers (Ruby, Crimson, Rose Pink, Amethyst for the hearts, Cocoa, Pastel Beige, Blush, Lime Green for Lily, and Terracotta, Satin, Duck Egg and Ice Grey 3 for Billy)
Studio G flocking
Font is another freebie - 'Musa Ornata' from dafont.com
Papers from the Best of Kim and Company Too pack
Fake stitching with a wee pink pencil!
The hearts were just cut out of card and coloured with Ruby and Rose Pink Promarkers

I am entering this into three challenges this week! They are:
and finally,

I hope you like it!